Dawn’s Delicious Blueberry Lemon Zucchini Bread

Zucchini season is upon us! I made this last year when looking to purge some too-giant-for-a-sidedish zucchinis, the kind where on Monday you stupidly thought, “Still too small; one more day and this will be perfect to pick.” And then you blink and Monday turns to Wednesday and the just-right zucchini morphs into mutant baseball bat zucchini and NOW look what you did? Yeah, those. Don’t throw them out! Make this delicious zucchini bread instead, and you can smugly tell all your friends, “I MEANT to do that.”

Ingredients:

3 eggs, beaten

2 cups sugar

2 cups grated zucchini (one very large or two normal size)

2 lemons, zest only

2 teaspoons vanilla extract

1 cup vegetable oil

3 cups all-purpose flour

1 teaspoon baking powder

1 teaspoon baking soda

1 teaspoon salt

3 to 4 cups fresh blueberries

Directions:

Preheat oven to 350 degrees. Grease and flour 2 loaf pans. In large bowl, beat three eggs. Mix in with eggs by hand sugar, oil, grated zucchini, vanilla, and lemon zest. In smaller bowl, combine flour, baking powder, baking soda and salt.

Add dry ingredients into wet ingredients until just combined. Do not over-mix. Gently add blueberries.

Divide into two 8 x 4 x 2 inch loaf pans, and bake at 350 for about 70 minutes or until inserted toothpick comes out cleanly. Beware of over-baking!


IMG_1124

IMG_1122

IMG_1128


Advertisement

Best Ginger Stoudt Cake Ever

I do not think I can adequately express how good this cake is. If you are a fan of gingerbread and are looking for something a little snazzier to serve during the holidays, look no further. Yes, it is a little more work than an ordinary cake to whip up, but it’s worth every bit of extra effort. I have not felt so passionately about a cake in a very long time!

This cake was supposed to accompany us to a Christmas party, but a violent stomach bug had other plans for our family. One by one we fell all week, and finally, on the day of the party, it was Andrew’s turn. I started out the day with my usual optimism and baked the cake, but by the afternoon, it was clear we were going nowhere, quarantined in House of Vomit and Misery. But at least those of us who could eat enjoyed this immensely!

The Marrow’s Ginger Stoudt Cake, original recipe courtesy of New York Times
Ingredients
2 tablespoons unsalted butter, at
room temperature
125 grams raw (Demerara) sugar (1/2 cup)
1 cup stout
1 cup molasses
1⁄2 teaspoon baking soda
340 grams all-purpose flour (2 cups)
1 tablespoon ground ginger
1 teaspoon cinnamon
1⁄4 teaspoon ground cloves
1⁄4 teaspoon freshly grated nutmeg
1⁄4 teaspoon freshly ground black pepper
1⁄4 teaspoon allspice
1⁄4 teaspoon fine sea salt
3 tablespoons grated fresh ginger
3 large eggs, at room temperature
1 teaspoon vanilla extract

Preparation
1. Heat oven to 350 degrees. Grease a Bundt pan well with the softened butter. Coat the entire pan with raw sugar so that it sticks to the butter. Turn the pan over to dump out any excess sugar.
2. Add the stout and molasses to a medium saucepan and bring to a simmer. Remove from the heat. Carefully whisk in the baking soda and let cool to room temperature. Be careful as the stout mixture will bubble up.
3. Sift together the flour, ground spices, pepper and salt. Set aside.
4. In the bowl of an electric mixer fitted with the whisk attachment, mix the fresh ginger, eggs, vanilla extract, dark brown sugar, and granulated sugar on medium speed for five minutes.
5. Turn the mixer down to low speed and add the oil. Mix for another 5 minutes. Slowly add the stout mixture and mix for another 5 minutes.
6. Carefully add the dry ingredients in two parts, mixing well in between each addition.
7. Pour the batter into the prepared pan. Bake for 55 to 65 minutes, or until a cake tester comes out clean. Let the cake cool for 15 minutes and then flip upside down to release while still warm. Let cool completely.

gingercake

Chocolate Caramel Pretzel Bark

Hello, there! Hope you are all enjoying this beautiful holiday season. I might think I look and feel young, but the fact that each December seems to arrive quicker than the last points to my impending old geezerhood. With age comes the wisdom to slow down and enjoy the important things whenever possible. Also with age comes the inclination to spew every cat poster cliche whenever possible, so forgive me. I can’t help it. Now excuse me while I smell the roses.

This recipe has been making its way through my Facebook feed in various incarnations. Admittedly, the culinary snob in me has a lot of reservations about any popular Facebook recipe. Favorite Facebook recipe ingredients usually include Cool Whip, Pillsbury Crescent Roll Dough and some variety of canned creamed soup. Notthattheresanythingwrongwiththat — usually just not my cup of fancy overpriced fair trade organic tea. However, when I notice more than a couple friends sharing something, I start to take notice. And I’m glad that I did! This one is a winner, for sure. Sometimes things don’t have to be impossibly challenging in order to be very good. Yet another lesson I am learning in my advanced years.

I have tweaked this, as I’m prone to do, and I’m quite pleased with the results. I am sure you can find a million other versions online, too. But I can personally vouch for this one, so why don’t you try it?

Chocolate Caramel Pretzel Bark

Ingredients
1/2 bag thin pretzels. I prefer the square ones pictured below, but use whatever’s on hand/on sale!
2 sticks butter (I think salted butter works best, but suit yourself)
1 cup brown sugar
1 bag (about 2 cups) semi-sweet chocolate chips
THAT’S ALL, CAN YOU BELIEVE IT?

Preheat oven to 350 degrees.

Line rimmed cookie sheet with parchment paper. Don’t have parchment paper? Well, buy some! I’ll wait. Don’t skip this part. Now arrange the pretzels on the sheet as close together as possible. See below.

Melt the butter and sugar in a saucepan and stir until melted, thickened and caramel color and consistency. It should be smooth, easy to pour, and thick but not TOO thick.

Carefully pour caramel over the pretzels as evenly as possible. Use a rubber spatula to help even out, but don’t despair if not perfect. Now pop it in the oven for five minutes. Wash your spatula. You will need it soon!

Remove from oven, sprinkle all the chocolate chips evenly over the caramel. Gently spread with rubber spatula until chips are melted. Keep on counter for about ten minutes, then freeze for about an hour. Cut into pieces, and store in an airtight container in the refrigerator. Remember, it’s fun to share! “Just two little pieces” quickly turns into “just ten pieces,” and before you know it, you’ve eaten the teacher’s gift. You’ve been warned!

Pretzel

Bark

Chocolate Chip Marshmallow Cookies

Well, hello there, friends! Long time no see, I know. I guarantee that I’ve missed you more than you’ve missed me, but this season of my life has not allowed for too much blogging. I will be back eventually, I promise, but in the meantime, I am trying to commit to a paltry one post a month minimum. And look, it’s July 31! Just made it under the wire. This confirms that if I had to earn my living writing, my family would starve.

We are having a great decent good enough summer, and I am trying to enjoy the best parts of it, especially after our brutal, therapy-inducing winter. My schedule usually allows me one or two weekdays at home with the kids, and I’ve been enjoying them so much. Today they wanted me to bake cookies, just like the good old days, and I was determined to use ingredients that did not require a trip to the store, just like the good old days.

When it comes to scouting out recipes, I tend to shoot first and ask questions later, and this was not an exception. Translation: Once I started this recipe, I realized that it is a MULTI-STEP PRODUCTION that involves A LOT OF WAITING. So basically today I did two things I always tell my kids not to do: waited until the last minute to complete a commitment (blogging) and didn’t bother to read all the directions before jumping in. Do as I say and not as I do, kids!

My children declared this the best cookie dough they’ve ever eaten, and I wholeheartedly agree. Of course, I cannot exactly advocate that unhealthy practice, but everyone gets to make her own choices (blah, blah, blah, salmonella). Truth be told, this would win a cookie dough contest. The secret is the Cornflake Crunch (see link below from Martha for directions). The cooking time is a source of some contention among commenters, and I did one batch at 13 minutes and one batch at 16 minutes. The 18 minutes stated might have turned the cookies totally black, so keep a careful eye starting around ten minutes. If you’re looking for a little something extra in your chocolate chip cookie (I hope that didn’t sound gross), this is a good one to try!

Chocolate Chip Marshmallow Cookies from Christina Tosi’s “Momofuku Milk Bar” cookbook

1 cup (2 sticks) unsalted butter, room temperature
1 1/4 cups granulated sugar
2/3 cup packed light-brown sugar
1 large egg
1/2 teaspoon pure vanilla extract
1 1/2 cups all-purpose flour
1 1/4 teaspoons coarse salt
1/2 teaspoon baking powder
1/4 teaspoon baking soda
3 cups Cornflake Crunch
2/3 cup mini chocolate chips
1 1/4 cups mini marshmallows

  1. Cream together butter and both sugars in the bowl of an electric mixer fitted with the paddle attachment on medium-high, 2 to 3 minutes. Scrape down sides of bowl and add egg and vanilla; beat for 7 to 8 minutes.
  2. Reduce speed to low and add flour, salt, baking powder, and baking soda. Mix just until dough comes together, no longer than 1 minute. Scrape down sides of bowl with a spatula.
  3. With the mixer on low, add cornflake crunch and chocolate chips; mix until just combined, 30 to 45 seconds. Add mini marshmallows and mix until just incorporated.
  4. Line a baking sheet with parchment paper. Using a 2 3/4-ounce ice-cream scoop or 1/3-cup measuring cup, portion dough out onto prepared baking sheet. Pat tops of cookie domes flat. Wrap baking sheet tightly with plastic wrap and refrigerate for at least 1 hour and up to 1 week. Do not bake cookies from room temperature or they will not hold their shape.
  5. Preheat oven to 375 degrees. Line additional baking sheets with parchment paper or nonstick baking mats.
  6. Arrange chilled dough at least 4 inches apart on prepared baking sheets. Transfer to oven and bake until puffed, cracked, spread, and browned on the edges, about 18 minutes. Let cool completely on baking sheets.

cornflakes

Cornflake Crunch

batter

Best cookie dough EVER

cookies

Homemade Vanilla Extract

Today is Mother’s Day and also my son Nate’s thirteenth birthday. I am so lucky to have a mom and be a mom, and I’m happy to celebrate this day with my mom and Nate.

As per tradition, I will be baking Nate’s birthday cake today. When I searched this blog for “cake,” I was surprised but not completely shocked to see so many cakes come up. Since working full-time (just celebrated my one year anniversary, hooray for me!), my baking has pretty much been limited to birthday cakes these days, with the occasional PMS-induced batch of cookies and brownies thrown in. Nevertheless, there is one ingredient even the very part-time baker always needs to have on hand: real vanilla extract!

I’ve been making my own vanilla for several years now. It’s the easiest thing in the world, and if you bake more than a few times a year, it’s also economical. There is something extra special, too, when you use ingredients you’ve grown or created. And by extra special, I mean superior and a little braggy, let’s be honest.

Homemade Vanilla Extract

Only two ingredients:
Vodka
Two whole vanilla beans, I used these

Instructions:
Thoroughly clean and sterilize any small glass jar, about 8 to 10 ounces. With a sharp knife, split the beans apart in two and place in jar. Cover with vodka. Shake. Keep in dark, cool place. Once a week, give it another good shake. In about one month, the vanilla is ready to use. Once your bottle starts getting low, replenish with more vodka and repeat process.

I think the pictures below illustrate the process pretty well, but please let me know if you need any clarification. Happy baking!

vanilla1vanilla2vanilla3vanilla4vanilla5

Nutella Pie

nightsinRodanthe

Greetings from the Outer Banks of North Carolina, where we are enjoying a lovely week at the beach. This is the first time any of us have been to North Carolina, and we are very impressed with the beautiful beaches and warm, friendly southern hospitality. We’re vacationing with long-time friends who also have three kids, and our meals and cocktail hours together have so far been delightful.

Last night we enjoyed some fresh caught red snapper from the fish market next door. It was originally supposed to be taco and margarita night, but the state of NC had other plans for us. Apparently no hard liquor can be purchased on a Sunday in this state, much to the dismay of my heathen heart, so margarita night is rescheduled for Monday.

My work friend gave me this quick and easy recipe that immediately appealed to my trashy side. It seemed like the perfect dessert to prepare for a beach vacation or any other need-a-quick-crowd-pleaser-dessert type occasion. I know I probably write like I think I’m too good for Cool Whip, but I’m really not. Well, okay, maybe just a little. Anyway, this dessert could not have been any easier or more of a hit. Minimal effort and maximum praise makes it a big winner in my book.

I followed the directions exactly, and it turned out very well. Since I’m not at home and have limited supplies, I didn’t have the time or inclination to tweak it. However, in a perfect world, I would probably make my own graham cracker crust and top it with real whipped cream.

The original recipe appeared on allrecipes.com by cook Christina right here.

Nutella Pie

Ingredients:
1 jar Nutella, 13 ounces
Philadelphia cream cheese, 8 ounces softened
1 nine inch prepared graham cracker pie crust
Cool Whip, 8 ounces, thawed

Directions:
Spread 1/4 cup of the Nutella on the bottom of the pie crust. Whisk together softened cream cheese and remainder of Nutella. Fold in Cool Whip. Pour into the pie crust and spread evenly. Refrigerate at least four hours or overnight.

coolwhip

Just four ingredients, CAN YOU STAND IT?

nutellapie

Homemade Nutella

I don’t recall what initially inspired me to make my own Nutella, but I’m guessing it was a combination of PMS and something I may have seen in Bon Appetit. However, once I finally looked up the Bon Appetit recipe online, I saw the reviews were pretty terrible, as were the reviews from The Splendid Table recipe. Resolute, I startled googling like a madwoman, bookmarking dozens of recipes and reviews until my head was spinning. I did not buy these hazelnuts in vain, dammit!

I knew I didn’t want additional sugar or heavy cream or powdered milk in my Nutella, three ingredients which appeared frequently. I wanted to make sure it stayed smooth and spreadable and didn’t harden into a lump, but I also wanted to make sure it wasn’t overly goopy. Most of all, I wanted it to taste as good or better than the original Nutella. Pulling from many different recipes, I came up with something which made sense to me as far as flavor and texture.

I conducted a blind taste taste on my three guinea pigs children, and they all agreed that my Nutella was far superior. Sure, they know who butters their bread, but they are also a pretty truthful bunch when it comes to important matters of dessert.

Warning! Warning! Warning! Make this at your own risk. If you need to be in a bathing suit or a wedding gown in thirty days or less, stay away from this recipe.

Dawn’s Homemade Nutella

Ingredients
1 cup raw hazelnuts, skins removed
1/2 teaspoon kosher salt
1 teaspoon vanilla
1 teaspoon honey
1 tablespoon cocoa powder
1 tablespoon peanut oil
12 ounces semisweet chocolate chips
4 tablespoons unsalted butter, room temperature and cut into small pieces

Directions

Preheat oven to 350 degrees. On a rimmed baking sheet, toast the hazelnuts for about 14 minutes, shaking sheet occasionally. Cool and remove any stray skin. In a Vitamix or other heavy duty blender, grind the hazelnuts into a fine powder. Add salt, peanut oil, vanilla, cocoa powder and honey. Mix in blender on highest speed until smooth.

In a double boiler, slowly melt the chocolate chips. Remove from heat and stir in the butter pieces until melted. Cool slightly and add to blender. Blend until completely smooth. Store in a glass jar, room temperature, for up to two weeks.

This does harden up a bit after 24 hours, but 15 to 30 seconds on high in the microwave (lid removed) brings it back to an easily spreadable consistency. Just be sure to store this in a glass container.

Photo1-2

Photo1-3

Coconut Butter Cream Easter Eggs

As I mentioned in a post from last year, I have a thing for Zitner’s Butter Krak eggs. Zitner’s makes a large variety of chocolate Easter eggs, but my favorite by a mile are the rich, coconuty, weirdly named Butter Krak eggs. I still remember being very, very pregnant in 1996 and sending a co-worker out into the cold, slushy streets of Philadelphia with a dollar to fetch mama a Butter Krak egg, and he has the audacity to come back and plunk down a marshmallow egg on my desk. MARSHMALLOW? I bellowed, DOES THIS LOOK LIKE BUTTER KRAK TO YOU? THIS IS NOT BUTTER KRAK! I SAID BUTTER KRAK! IF I WASN’T NINE MONTHS PREGNANT I WOULD THROW THIS EGG AT YOUR GIANT HEAD INSTEAD OF EATING IT ANYWAY! Let’s just blame pregnancy hormones, shall we?

Today, many years later, I had the great idea of making some coconut butter cream eggs myself. This is definitely one of the easier desserts I’ve ever made. Messy? Yes. But not difficult. Well, not difficult once I quickly abandoned the idea of dipping in chocolate once, sprinkling more coconut on top, and then dipping a second time. Gravity, it turns out, can be kind of mean and very messy. But that’s okay! Nothing a few shakes of rainbow sprinkles couldn’t fix right up. I’m quite pleased with how well these turned out.

Coconut Butter Cream Eggs

1 stick (1/4 pound) unsalted butter, softened

16 ounces powdered (confectioner) sugar

1 teaspoon vanilla

1 – 2 tablespoons milk

1/2 cup unsweetened coconut. Please obey me about the unsweetened part. It will truly be too sickeningly sweet of you use sweetened coconut. I don’t want to be responsible for you developing diabetes; I’m skating on thin ice as it is.

Rainbow sprinkles (optional)

2 to 3 cups of high quality semi-sweet chocolate chips, melted per package instructions

Directions:

In a heavy duty mixer with paddle attachment, beat butter and sugar until combined. Add vanilla and milk, one tablespoon at a time, and continue until very smooth. Add coconut and mix 30 to 60 seconds more, scraping down sides.

Shape 16 to 18 eggs and place on wax paper on a plate. Refrigerate for a few minutes until chilled and very firm.

Melt chocolate chips per package instructions or method of choice. Line a large cutting board with wax paper. Using a fork, dip and coat each egg in chocolate, then place on board. Apply sprinkles, if using.

Yield: 16 to 18 eggs

naked eggs

Eggs

chocolate egg

Incredible Hulk Muffins

Greetings from the height of flu hysteria here in the US, or Flusteria 2013, as I like to call it. We’ve managed to dodge the flu bullet so far, but between Ed’s airplane travel and three kids in three different schools, I’m sure it’s just a matter of time before one of us falls. I’m a little scared. When I’m scared, I bake. (Note: I also bake when I am happy and sad and excited and disappointed.) Don’t ask me how that diet is coming along.

Believe it or not, for every recipe I post, there are ten more that don’t make the cut. I have gotten in the habit of taking pictures of everything I make, just in case it turns out to be THE BEST THING EVER, but usually I’m just left with a lot of (sometimes unidentifiable) food pictures on my iPhone. To be honest, I never expected this recipe to make the cut. I was reasonably certain my kids would hate these muffins and at best I’d have an amusing story to share about how disgusting they were. Wrong!

My boys are now 16, 11 and 9, and they come home from school starving every afternoon. Once the weekly ration of junk food is gone, it is gone, and I refuse to buy any more until my next scheduled shopping trip. We always have fruit, veggies and dip, peanut butter and jelly, etc. but things like pretzels and chips and cookies/cupcakes are purchased in limited weekly quantities. This does not always go over well, but I don’t think my kids benefit from eating crappy food before dinner seven days a week. They buy the school lunch and are able to purchase snack foods during lunchtime, so it’s not like they’re subsisting on organic apples alone. Don’t feel too sorry for them!

I decided to use after-school-feeding-frenzy time to my advantage yesterday, as hungry people are not always very particular about what they shove into their gullets. If there was ever a time they would willingly eat a green muffin, it would be after school. Not only did they eat it, they begged for more and asked me to make these every day. I’m still a little shocked about that, but I’m happy to ride this wave as long as possible.

These muffins are not exactly healthy, but they are better than a lot of processed alternatives. I used oat flour, which I made easily in my Vitamix, but you can certainly use all-purpose wheat flour if you prefer.

Incredible Hulk Muffins

WET INGREDIENTS
2 large eggs
1/2 cup plain Greek yogurt
1 cup (or less) brown sugar
1 banana
1/2 cup walnuts
large handful of kale

DRY INGREDIENTS
2 cups oat flour
1 teaspoon baking powder
1/2 teaspoon salt
1/2 (or more) cup chocolate chips

Preheat oven to 350 degrees. In a heavy duty blender, mix wet ingredients (including walnuts and kale) until completely smooth. This may take a couple minutes, depending on the blender, but we don’t want any walnut or kale pieces.

In a large bowl, mix all dry ingredients until well combined. Being careful not to over mix, pour wet ingredients into bowl of dry ingredients and gently stir until just combined. Spray or oil a standard muffin tin and fill with about 1/2 cup of mixture per muffin. Bake for 15 to 20 minutes.

Vitamix

HulkHUNGRY

Easy Butter Toffee

For the first time in many, many years, I am working a lot during the holidays. Well, let me rephrase that. I am working a lot for me. I am used to having all the time in the world to shop and bake and read and work out (not that I ever did much of that) and have lunch with friends, and suddenly I’m…what’s that word called when there’s not much time to do whatever you please?…busy! Yes, I’m busy. Almost every second needs to be used efficiently these days. I kind of like it, but I kind of hate it, too.

On the plus side, I’ve managed not to eat my weight in cookies this season. On the minus side, my creative time in the kitchen has really suffered. I miss cooking and I miss blogging. Eventually, I will figure out a way to make it all work out, but for now it’s a bit overwhelming. Last week, for example, I purchased Williams-Sonoma’s ridiculously overpriced Handcrafted Toffee as part of a hostess gift. Back in the day, I would sooner sell a kidney than pay thirty bucks for a small amount of toffee. But these days, with minimal spare time in the kitchen, I had to pony up the cash. I did, however, make a promise to myself to attempt to make my own toffee the next time I had a chance.

Can you believe I don’t own a candy thermometer? I had to borrow one for this recipe. In reading the comments of the many different recipes I browsed, I suggest you do the same if you don’t already own one. Unless you’re an experienced candymaker who can eyeball the color of 300 degrees, invest in obtaining a thermometer. Other than that, I’d venture to say you already have most of the ingredients in your kitchen right now. This is easy and delicious, and it would make a great holiday gift.

Easy Butter Toffee

1 cup (two sticks) unsalted butter

2 teaspoons water

1 cup white sugar

1/8 teaspoon salt

1 teaspoon vanilla

1 cup semi-sweet chocolate chips

1/2 cup slivered almonds, toasted (optional)

In a deep and heavy saucepan, slowly melt butter, water, salt and sugar over LOW HEAT. Once completely melted, raise heat to medium, and stir occasionally. When the water boils off and thickens, insert your candy thermometer in mixture. Watch carefully, and continue to stir. As soon as thermometer passes 300 degrees but before 320 degrees, remove from heat and stir in vanilla.

On a baking sheet lined with parchment paper or buttered, spread mixture evenly into a rectangular shape. Sprinkle chocolate chips over mixture and after about 30 seconds, gently spread with back of spoon or a spatula. Top with slivered almonds, if desired. After about ten minutes, move to refrigerator for at least 30 minutes.

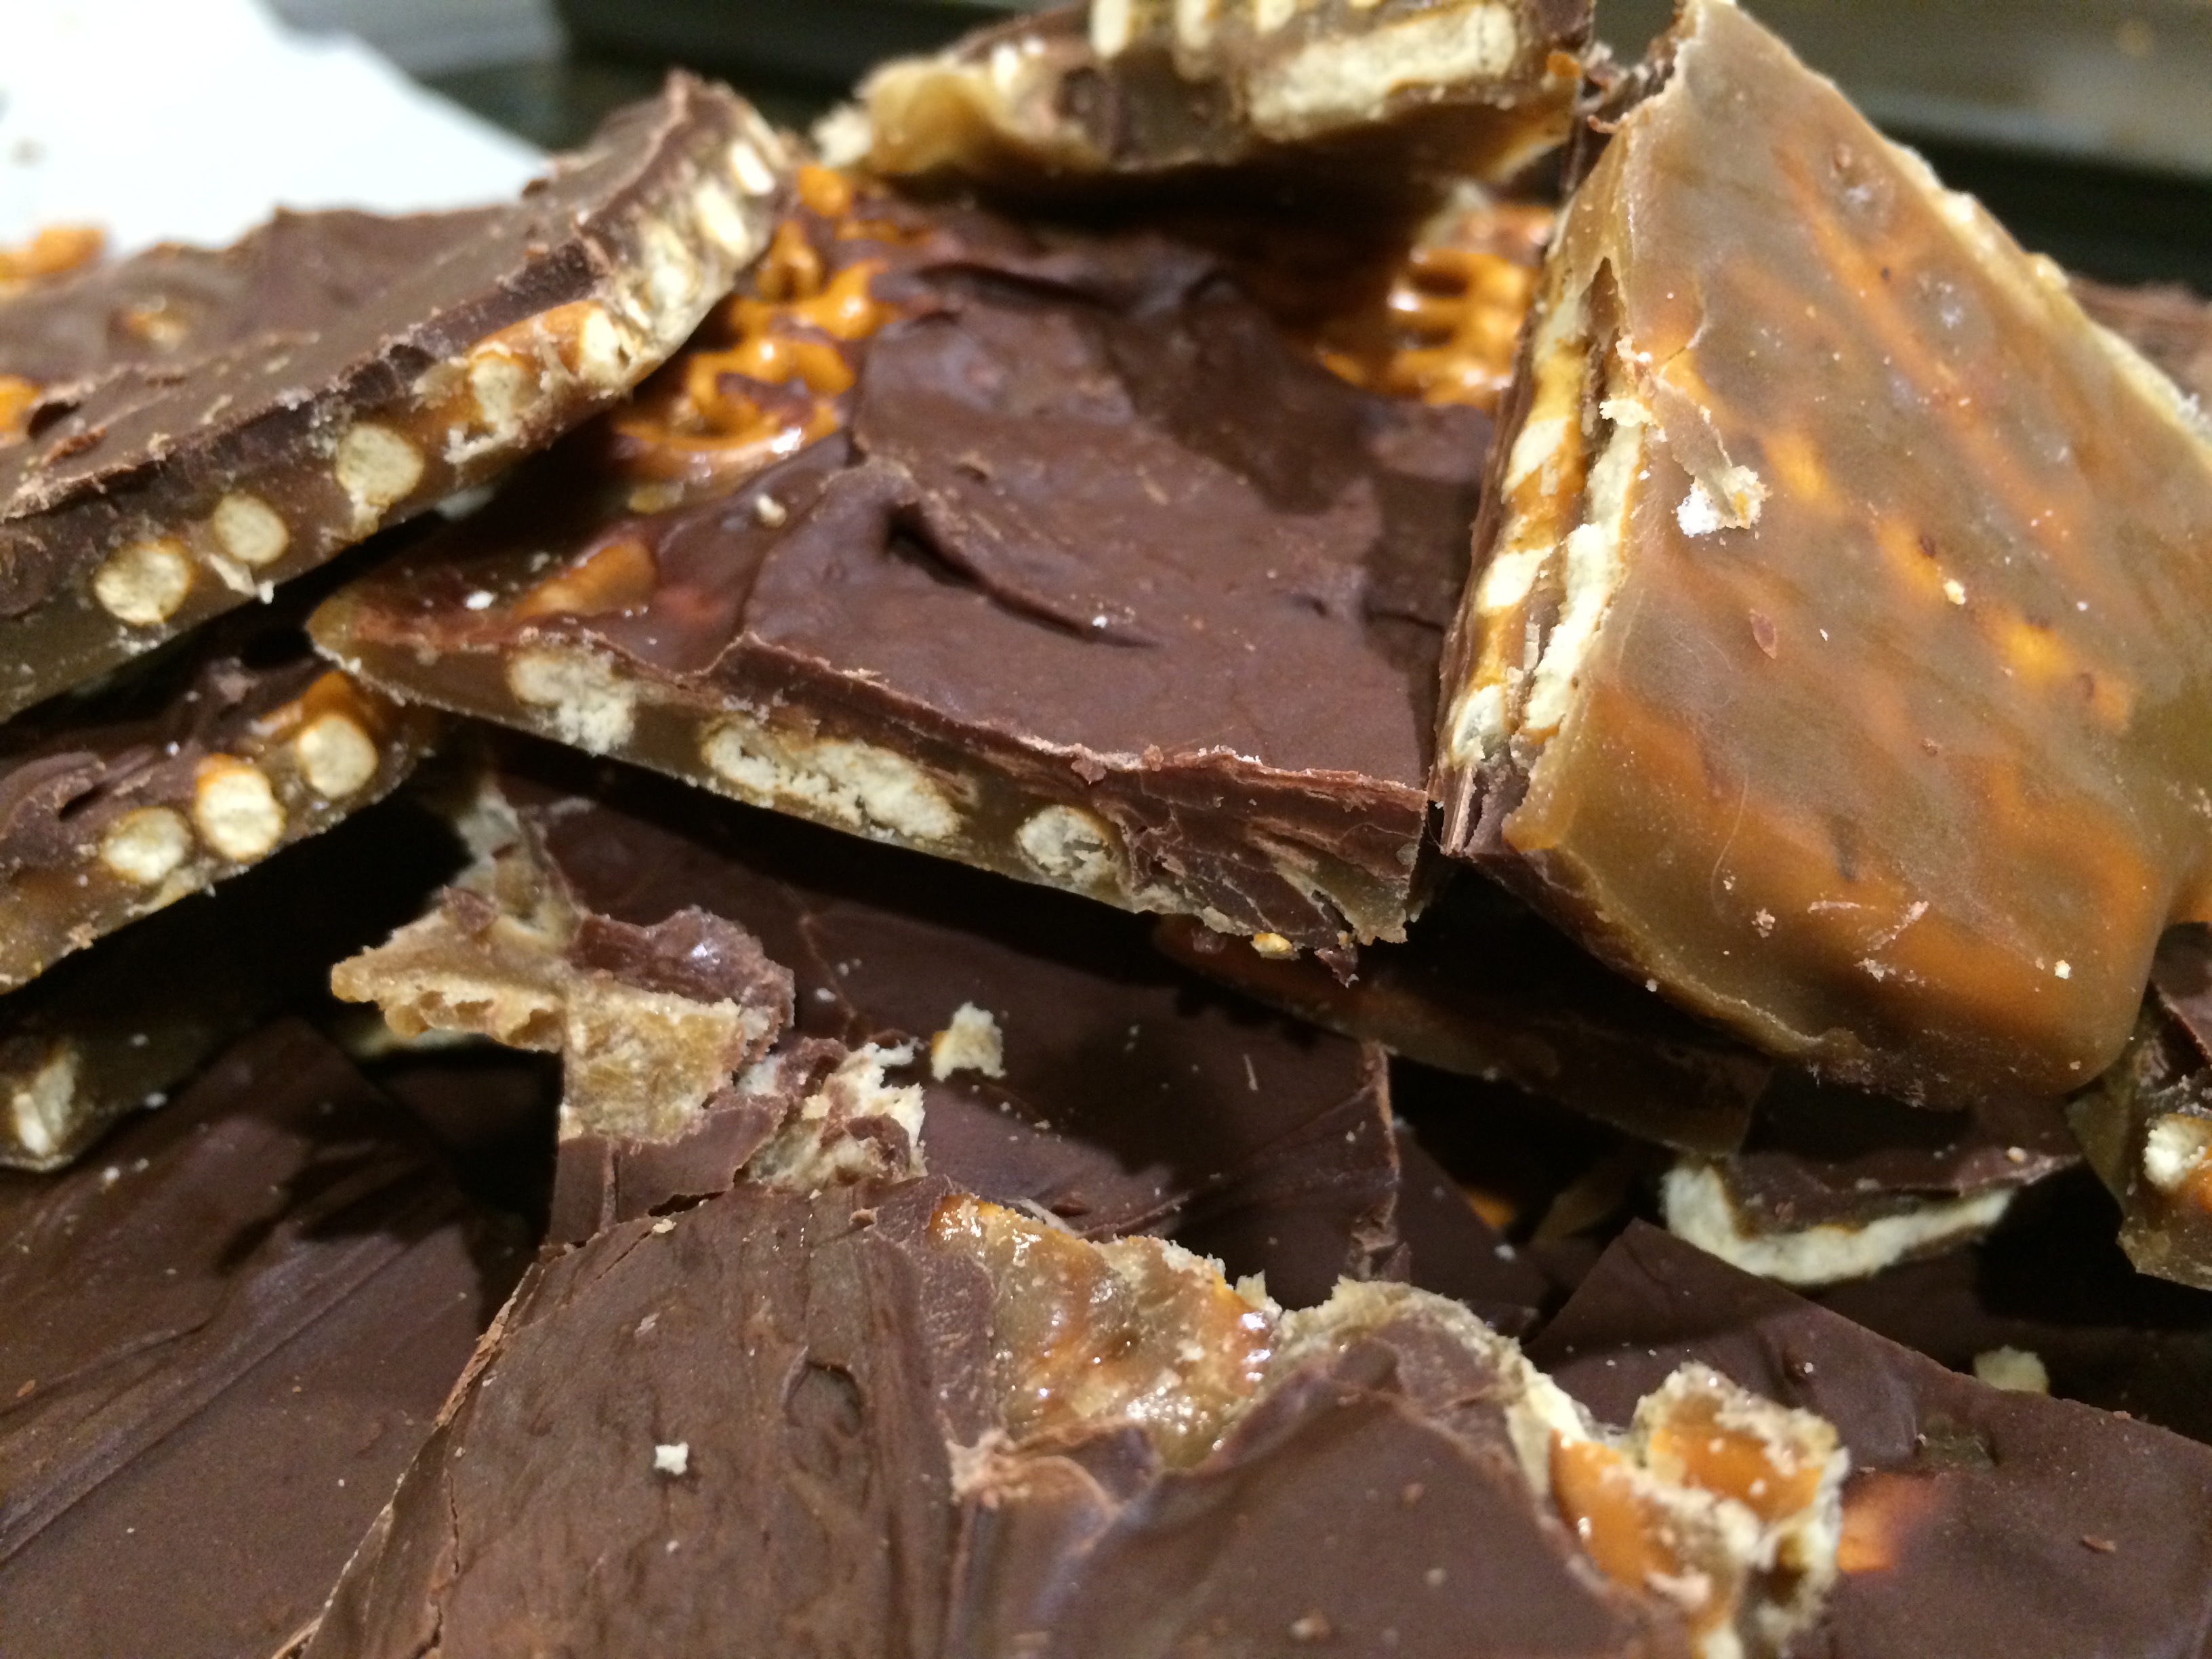
Once completely cooled and hardened, break into pieces and seal in an airtight container. Keep refrigerated until serving.

candythermometer

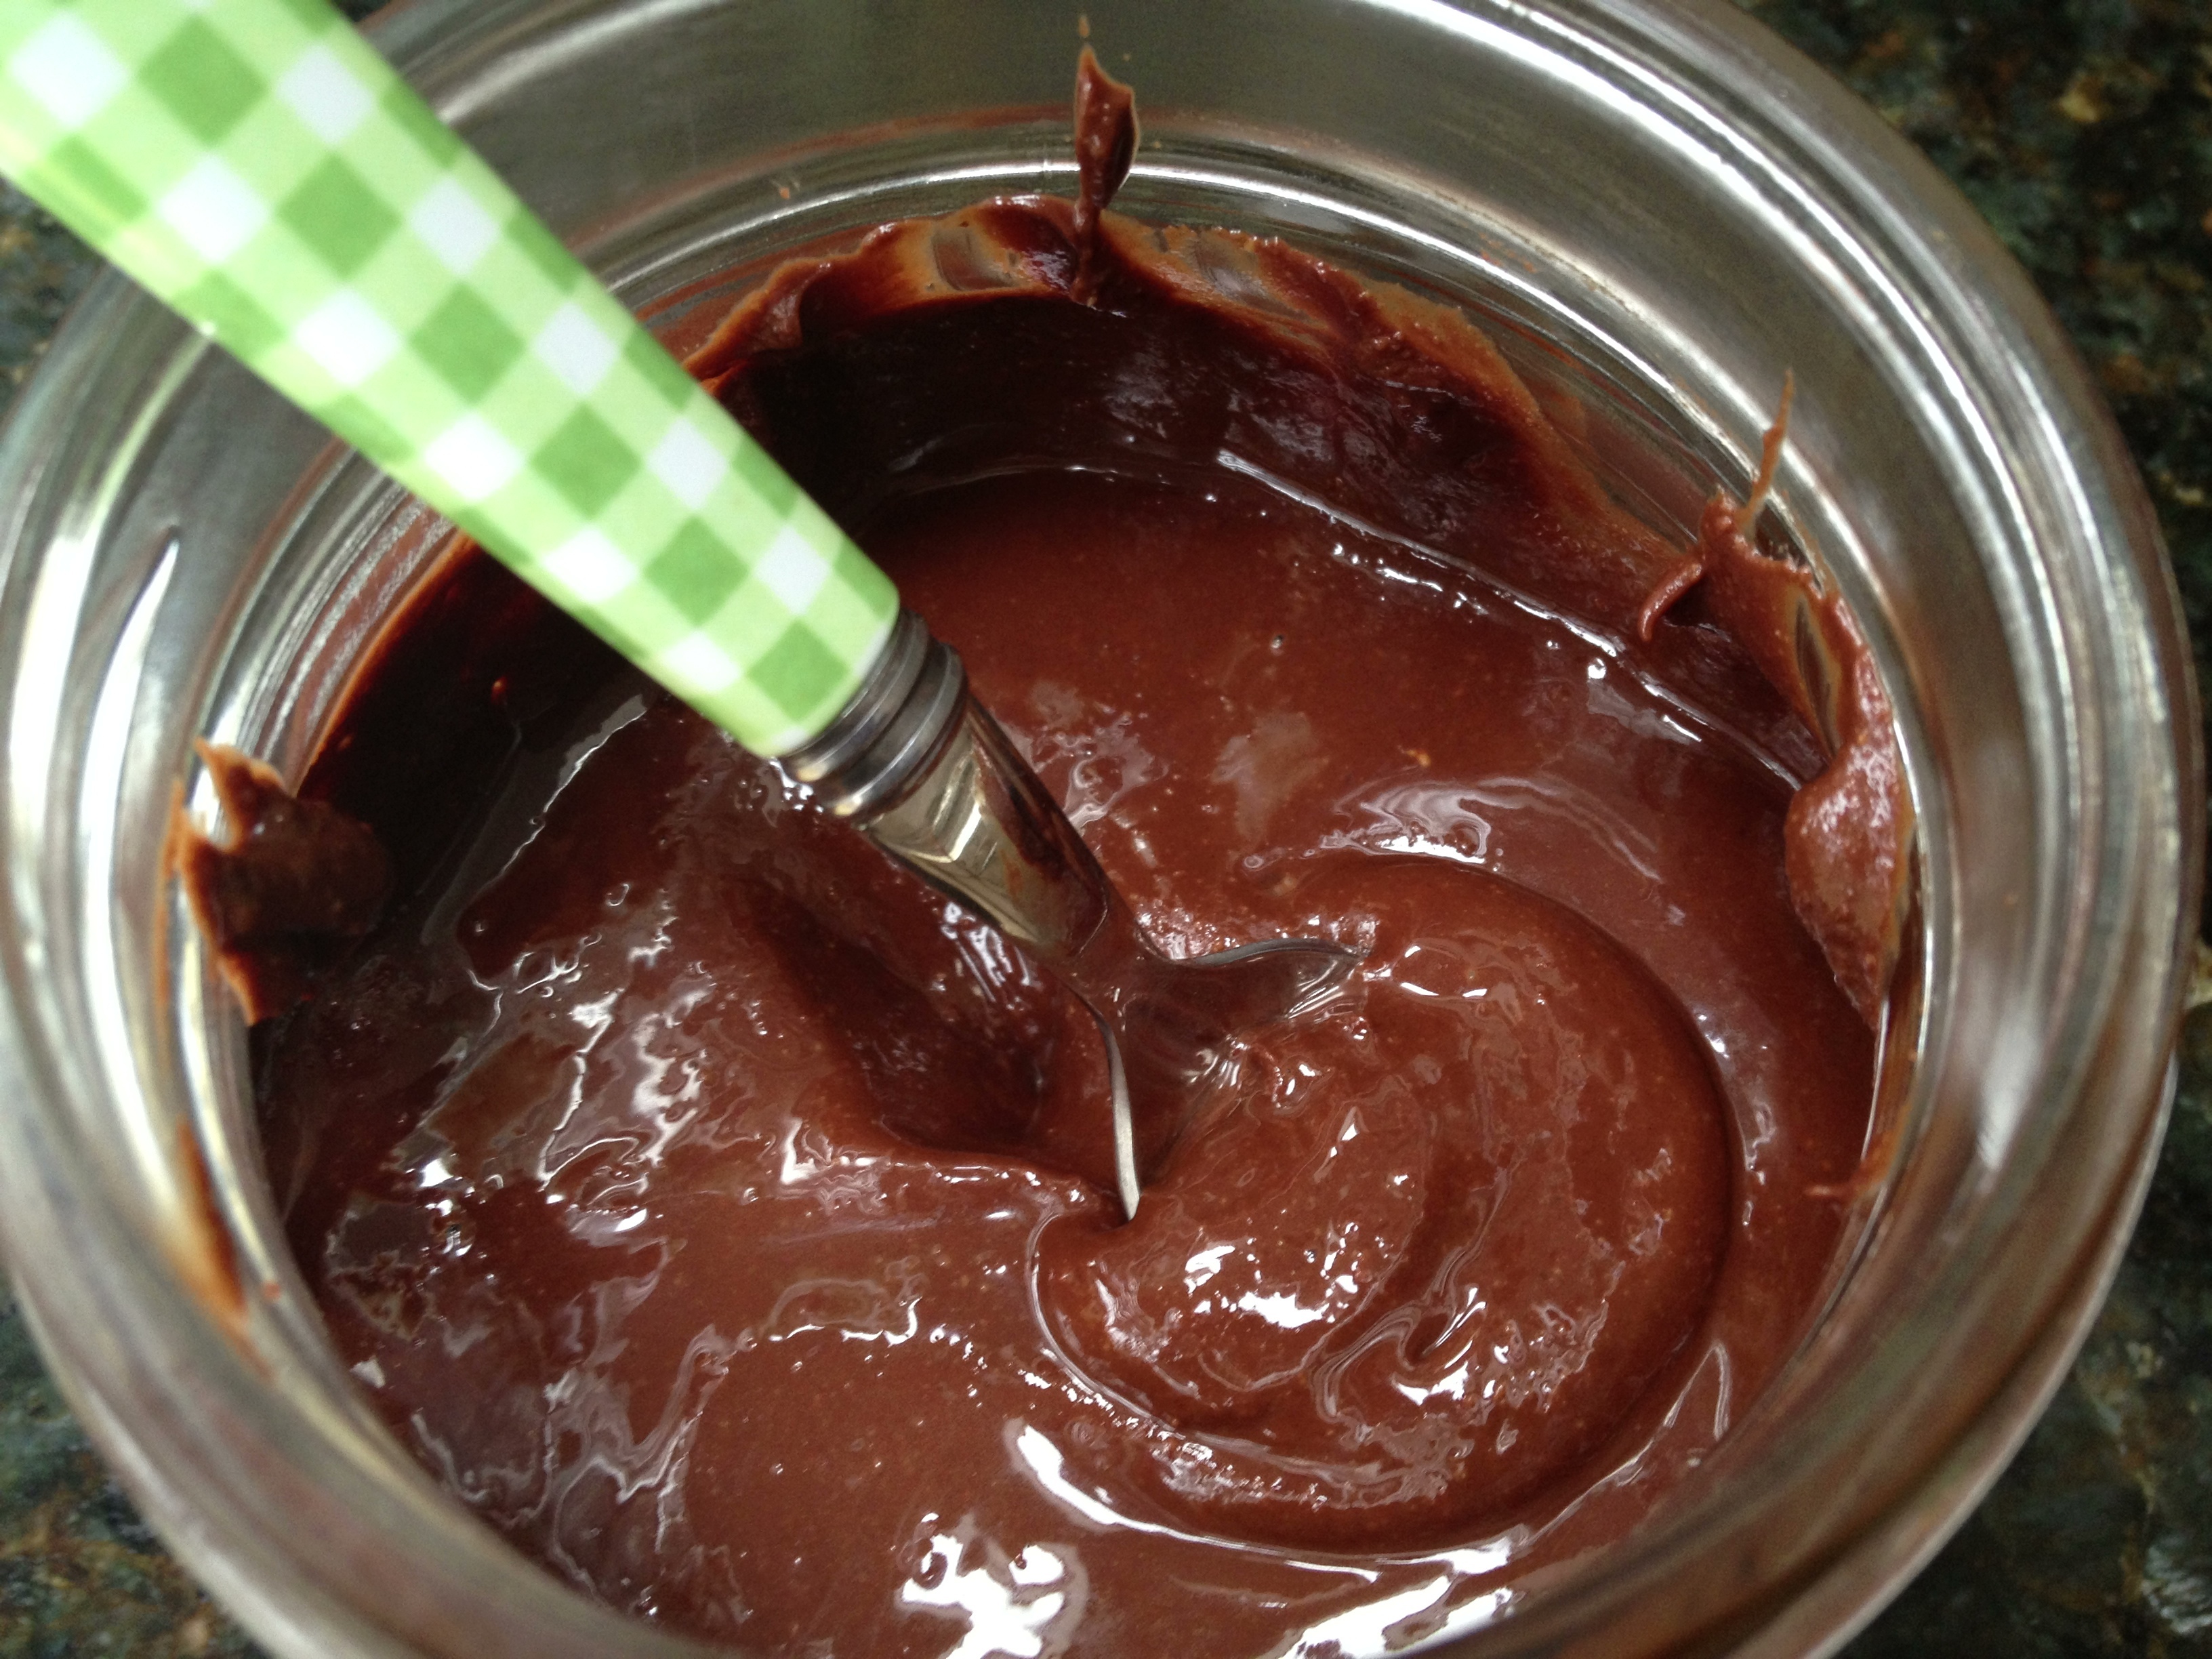
This is how it looked right around 300 degrees. Don’t be alarmed.

chocchips

This is what it looked like spread onto parchment paper. Notice the rich color.

avecalmonds

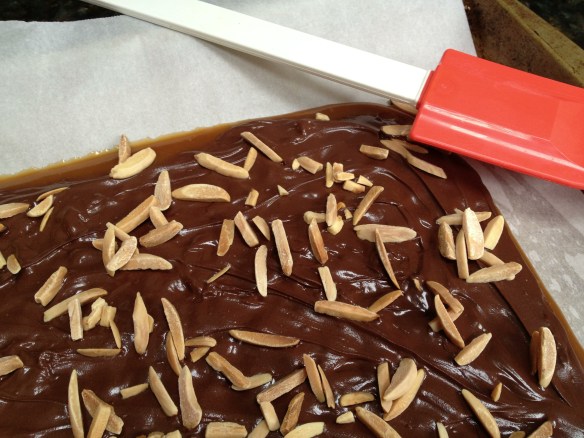
This is what it looked like before going into the refrigerator.

buttertoffee

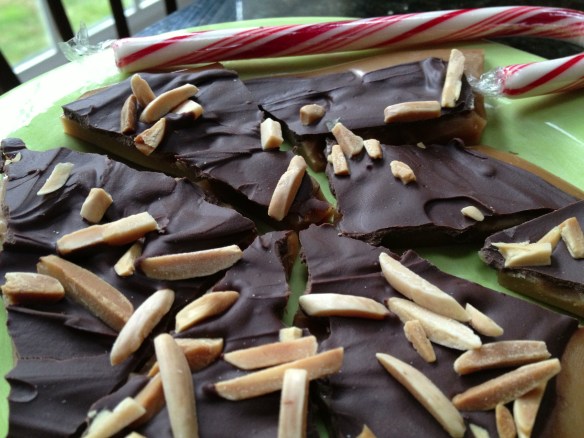
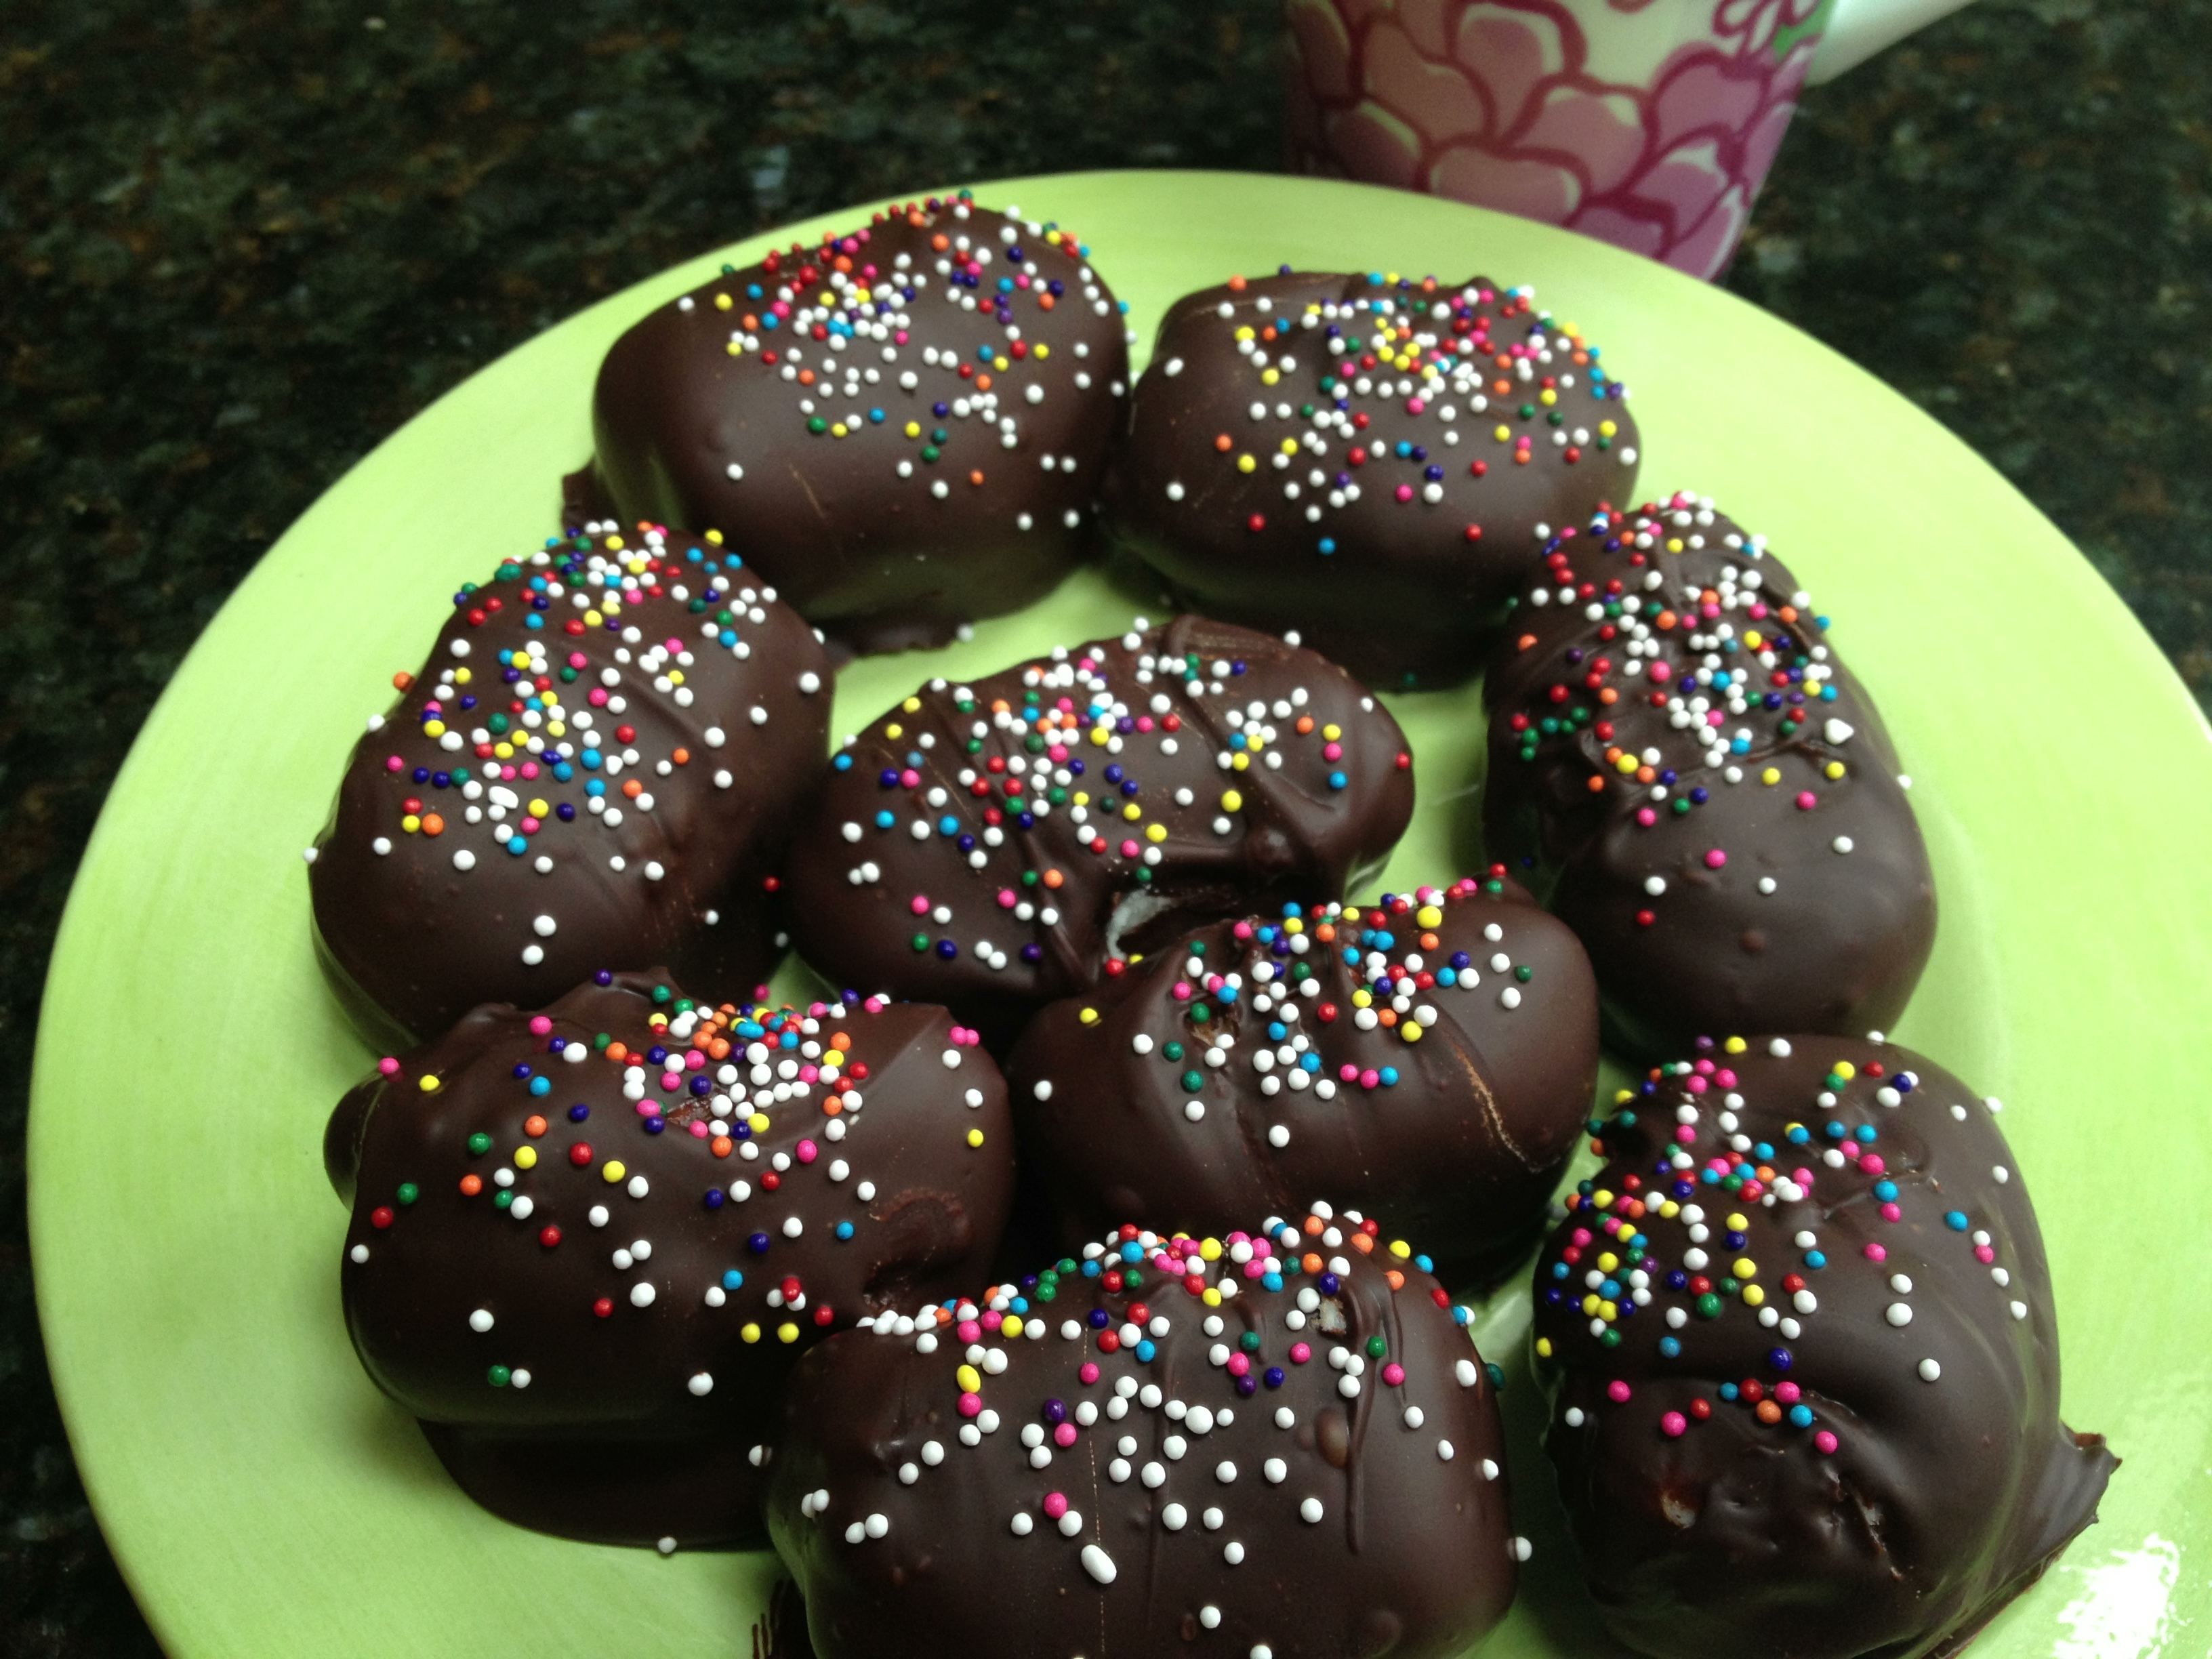
The final product, ready to be boxed and shared.