Yeah, I Served My Family Green Kohlrabi and They Ate It, No Big Deal

We’ve already established with romanesco that I have a thing for unusual vegetables. Lucky for me, I shop at Wegmans, where they are always stocking the latest and greatest of whatever is in season. I love trying new foods, and for a know-it-all like me, it’s always a great thrill to stumble across something I’ve never eaten before.

Green kohlrabi looks a bit like an alien spaceship (if you use your imagination, or perhaps if you have an eight year old living in your house). Essentially, it’s a little cabbage with green sprouty things sticking out of its head, and presumably you can eat those, too. Green kohlrabi is German for “cabbage turnip,” but don’t let that put you off. It’s a little less in-your-face than in sounds, and it kind of reminded me in flavor of a more subdued daikon radish. The texture was similar to an apple.

I cubed it and then tossed it with olive oil, salt and pepper and roasted it at 400 degrees for about an hour. Halfway through, I gave it a good stir, then returned it to the oven.

I also decided also to grate some to put on my salad today, and I only wish I would have squirreled away more. While it was very good cooked, I think I prefer it raw. This is a great addition to a salad or a cole slaw, plus the added cool factor of being able to toss “green kohlrabi” into a sentence.

Easy Cheesy Scalloped Potatoes

This recipe is a family favorite and something I’ve tweaked a lot over the years until it got to its current point of us fighting over the last tiny portion. Then I knew I had a winner! It is the perfect potato side dish for Easter or Passover (or Eastover) or any old Tuesday night. I use my food processor slicing blade for uniformity, and I scrub but don’t peel my potatoes. We had them tonight with filet mignon, caramelized onions and sauteed mushrooms. If there is a more satisfying meal on earth than that, I don’t want to know about it.

Easy Cheesy Scalloped Potatoes, serves 4 generous portions or 6 smaller portions

Ingredients

8 small potatoes or 6 medium potatoes, thinly sliced

1/2 medium onion, chopped

2 Tablespoons butter

2 Tablespoons flour

1 1/4 cup whole milk

1 1/2 cup grated cheddar cheese

1/4 teaspoon salt and ground pepper

Directions: Preheat oven to 350 degrees. Cook onion in butter until soft. Add flour and whisk for about 2 minutes. Add milk and stir until thick and bubbly, about 2 more minutes. Add 1/4 t. salt and pepper. Remove from heat and stir in 1 cup of cheese.

Place potatoes in casserole dish and sprinkle with more salt and pepper. Pour sauce over potatoes and mix well to distribute. Top with remaining 1/2 cup of cheese. Bake, covered, for 50 minutes. Remove cover and bake for ten more minutes. Let stand ten minutes before serving.

Twice-Baked Sweet Potatoes with Leeks and Sausage

Fat potatoes for Fat Tuesday!

I don’t know how I originally overlooked this recipe back in the fall, but I was very excited to try it this week, as it contains all my favorites in one neat little package. Sausage? Check. Leeks? Check. Sour cream? Check. Sweet potatoes? Check. Fancy cheese? Check.

Depending upon your portion size and your appetite, this works equally well as a main dish or a side dish. It feels like a very strong side dish, so I would pair it with something on the plainer side like roasted chicken or broiled fish.

Twice-Baked Sweet Potatoes with Leeks and Sausage by Martha Holmberg, Fine Cooking, October 2011 (printable recipe here)

Ingredients

4 small sweet potatoes (about 8 oz. each)
1 Tbs. olive oil
1/2 lb. bulk sweet Italian sausage (or link sausage, casings removed)
1 Tbs. unsalted butter
1 lb. leeks, white and light-green parts only, quartered lengthwise and thinly sliced (about 2 cups)
1 tsp. chopped fresh sage
1/4 tsp. chopped fresh thyme
Kosher salt
1/2 cup sour cream
1/4 cup grated Gruyère

Directions:

Position a rack in the center of the oven and heat the oven to 375°F. Line a heavy-duty rimmed baking sheet with parchment or foil.

Poke the sweet potatoes a few times with the tip of a knife and arrange them on the baking sheet. Bake until completely tender when pierced in the fattest part with a skewer, 35 to 60 minutes.

Meanwhile, heat the oil in a 10-inch skillet over medium-high heat. Add the sausage, reduce the heat to medium, and cook, breaking it into small bits with the edge of a slotted spoon, until no longer pink, 5 to 6 minutes. Transfer to a plate and set aside.

Pour off all but 1 Tbs. of the fat and add the butter. When it melts, add the leeks, sage, thyme, and 1-1/2 tsp. salt. Cook, stirring stirring, until the mixture just starts to sizzle. Reduce the heat to low and cook, stirring frequently, until the leeks are very soft and starting to turn golden, 10 to 15 minutes.

When the sweet potatoes are cool enough to handle, carefully cut them in half lengthwise and gently scoop the flesh into a medium bowl, leaving about 1/8 inch of flesh in the shells. Mash the scooped flesh with a fork or potato masher until smooth. Stir in the sour cream and 1 tsp. salt. Fold the sausage and leeks into the mashed sweet potato and season to taste with salt.

Position a rack 6 inches from the broiler element and heat the broiler on high. Mound the filling into the potato skins and top with the cheese. Put the potatoes in a 9×13-inch baking dish and broil until the cheese is golden, about 4 minutes. Serve immediately.

Ready to go in the oven.

Super Quick Minestrone

This is called Super Quick Minestrone, but it probably should be called Not Overly Time Consuming Minestrone instead. “Super quick” feels like a bit of an exaggeration. There is a fair amount of chopping and babysitting of ingredients in this recipe. I wasn’t expecting to microwave a can of Progresso and call it a day or anything, but I guess my concept of “super quick” differs with the author’s. Semantics aside, it still is a very lovely minestrone and the only one I bother to make these days, so that has to count for something.

You may notice in my picture that the zucchini looks a lot like green beans and that the shell shaped pasta is not a tube shaped pasta. It is also a very forgiving minestrone which is open to improvisation and substitution. However, I do strongly recommend sticking to the pancetta if possible.

Super Quick Minestrone by Michael Chiarello (printable recipe here)

Ingredients

  • 1 cup (4 ounces) tubetti pasta, or other small pasta shape
  • Extra-virgin olive oil
  • 6 cups chicken stock
  • 1/4 pound pancetta, cut into 3 pieces
  • 6 medium garlic cloves, each cut in 1/2 lengthwise
  • 2 cups finely chopped yellow onions (2 small onions)
  • 1 cup small-diced celery (2 medium stalks)
  • 1 cup small-diced carrots (2 to 3 medium carrots)
  • 1 tablespoon finely chopped rosemary or thyme leaves
  • 1 (14-ounce) can cannellini beans, drained and rinsed
  • 1 (14 1/2-ounce) can diced tomatoes
  • 4 cups small-diced zucchini (green/yellow) (5 small zucchini)
  • 2 cups small-diced, peeled russet potatoes (1 large russet)
  • Salt and freshly ground black pepper
  • 1 cup freshly grated Parmesan

Directions

Bring a large pot of salted water to a boil over high heat. Add the pasta and cook according to package directions until al dente. Drain and transfer the pasta to a baking sheet. Toss the pasta with a little olive oil to prevent sticking.

In a large saucepan over medium heat, warm the chicken stock.

In another large saucepan over high heat, heat 1/4 cup oil. When the oil is hot but not smoking, add the pancetta and cook until it begins to brown, 3 to 4 minutes, turning occasionally. Add the garlic and cook until it begins to brown, about 1 minute, stirring occasionally. Lower the heat to medium and add the onions, celery, and carrots.

Cook until the vegetables are soft, 8 to 10 minutes, stirring occasionally to prevent browning. Add the chopped herbs. Raise the heat to high. Add the beans, tomatoes, zucchini, and potatoes. Add the chicken stock and bring to a boil. Then bring it down to a simmer and cook until the potatoes are tender, 12 to 15 minutes, skimming any foam off the top of the soup. Season generously with pepper. Add salt, to taste. Just a few minutes before serving, add the cooked tubetti pasta. Serve warm with Parmesan and olive oil passed at the table.

Cooking notes: Add the cooked pasta just before serving. If it sits in the soup too long, it develops a flabby texture. Tubetti (little hollow tubes) are the classic pasta for minestrone, but you could substitute another small shape of pasta.

Sex, Lies, Cream of Tomato Soup

Sorry for the deceptive title, but I wanted you to read this.

I have always adored tomato soup of all varieties. It’s like a warm hug from a favorite aunt, loving and unpretentious. The best tomato soup I ever had was the tomato-cheddar at Henry David’s Restaurant in Keene, NH. Sadly, Henry David’s no longer exists, but twenty-plus years ago, it was THE restaurant to go to in Keene, NH. Back in college, I would trek to Henry David’s in my LL Bean Maine hunting boots with my roommates and enjoy a nice hot cup of tomato-cheddar. Maybe it was the snow and slush that covered Keene from November until March, maybe it was the slim pickings of our dining hall, maybe it was the fact I was always starving back then, but no soup has ever tasted so satisfying to me before or since. I have tried numerous times using various recipes to find a tomato-cheddar that I like as much as Henry David’s, but I have never been successful. Perhaps  the missing secret ingredient is my youth? If, by chance, you happen to have a great (not merely good, GREAT) tomato-cheddar soup recipe, I sincerely hope you will share it with me.

Continuing our tour of Keene, NH, we come to a humble little diner that has been in existence since 1961 and has the honor of being the spot of the first, last and only waitressing job I’ve ever held for the hardest two months of my life.  If you are a political show junkie as I am, you may already be familiar with Lindy’s Diner in Keene, NH. If you plan on winning the NH primary, I highly suggest you visit Lindy’s. I have the distinction of being the worst waitress who ever served in their long and proud history, as well as the one who cried the most in front of customers and who received the most pennies and nickels for tips. Since this was 1988 and not 1908, a seventeen cent tip is every bit the insult you think it is.

Despite my traumatizing but short-lived diner waitress career, I still love diners to this day. Like tomato soup, diner food is always such a comfort to me. I was so excited to come across this recipe in Diner Classics chapter of Jane and Michael Stern’s Square Meals for Cream of Tomato Soup: a little bit wholesome, a little bit trashy, a whole lot of perfect.

I used tomatoes I had frozen at the end of the summer from my garden. Since they are Romas and a bit smaller, I used eight instead of six.

I love that there are onions AND scallions AND garlic in this soup. Probably not suitable for a first date, but extra flavorful nonetheless.

The result is a richly layered soup that is not too heavy. I know this is a classic diner offering, but I would serve it to special guests with pride. Thank you, Sterns!

Cream of Tomato Soup, from Square Meals by Jane and Michael Stern

1 onion, chopped fine

1 carrot, chopped fine

4 Tablespoons butter

3 Tablespoons all-purpose flour

1 quart chicken broth

6 fresh and large ripe tomatoes, peeled and chopped course

1 clove garlic, crushed

6 scallions, chopped fine

4 white peppercorns, whole

1 teaspoon salt

1 Tablespoon sugar

1 cup light cream

In a deep pot, saute onion and carrot in butter until onion turns slightly brown. Add flour; mix well. Slowly add broth, tomatoes, garlic, scallions, peppercorns, salt and sugar. Cover and cook over low heat 1 1/2 hours.

Blend in blender or food processor and add cream. Garnish with a sprinkle of basil, oregano, or toasted croutons. Serves 4 to 6.

Chicken Corn Chowder

One of my favorite food blogs which I recently discovered is Growling Tummy. As soon as I saw this recipe for Chicken Corn Chowder, I knew it had high potential. And I was right! Four out of five family members loved it (even Mr. Picky), and the only one who didn’t finish it practically fell asleep in his soup due to a very fun sleepover birthday party at the Great Wolf Lodge…so I am not blaming the recipe! Ed said it reminded him a bit of the soup version of chicken pot pie, and I agree. The jalapeno gave it a wonderful kick, and the roasted red pepper added nice color and flavor. I used a rotisserie chicken, too, which made this soup incredibly quick and easy to prepare (albeit a bit pricier). I will definitely be making this again!

Growling Tummy’s Chicken Corn Chowder

Ingredients:

  • 2 tablespoons butter
  • 1/2 cup chopped onion
  • 1/2 cup chopped celery
  • 2 medium potatoes, chopped
  • 1 jalapeño pepper, seeded and minced
  • 3 tablespoons all-purpose flour
  • 3 cups reduced-fat milk
  • 2 cups reduced sodium chicken broth
  • 2 cups chopped roasted skinless, boneless chicken breasts, rotisserie chicken works great here (vegetarians can omit the chicken and its still a great chowder)
  • 1 1/2 cups fresh or frozen corn kernels (about 3 ears, but you can use frozen)
  • 1/4 teaspoon ground red pepper
  • salt to taste
  • 2 roasted red peppers from a jar, chopped
  • 1 (14 3/4-ounce) can cream-style corn

How To:

Melt the butter in a large Dutch oven over medium heat. Add onion, celery, potato and jalapeño and cook for 3 minutes or until tender, stirring frequently. Add flour; cook for 1 minute, stirring constantly. Stir in milk and remaining ingredients. Bring to a boil and cook until thick (about 5 minutes). Reduce heat and serve (biscuits work great as a compliment).

Bagels and Butter

We are lucky to have good bagels around here. Our local bagel store used to be owned by a woman who I called the “Bagel B____ (rhymes with witch),” or BB, for short. I’m pretty sure I’m not the only person who called her that. God, she was vile. I worked with NYSE floor traders who had more patience than this woman. And I was (for the most part) a very good, very efficient bagel orderer.  99% of the time I knew exactly what I wanted and spoke in a clear, concise fashion with no dilly dallying, and she was still miserable and rude. Fortunately, a much nicer man has since bought the store, and I am now safe to modify my order without BB’s scorn.

I am so very proud of myself. Yesterday I made bagels for the first time and homemade butter for the second time. Both were surprisingly easy. Luisa, my favorite food blogger at The Wednesday Chef, shared Peter Reinhart’s Amazing and Almost Idiot-Proof Recipe, and I was inspired to try myself. Assuming I can keep up with a good workout schedule, I am thinking of making bagels weekly. Or, at least, monthly. In any event, they are so good that I am already dreaming of next time.

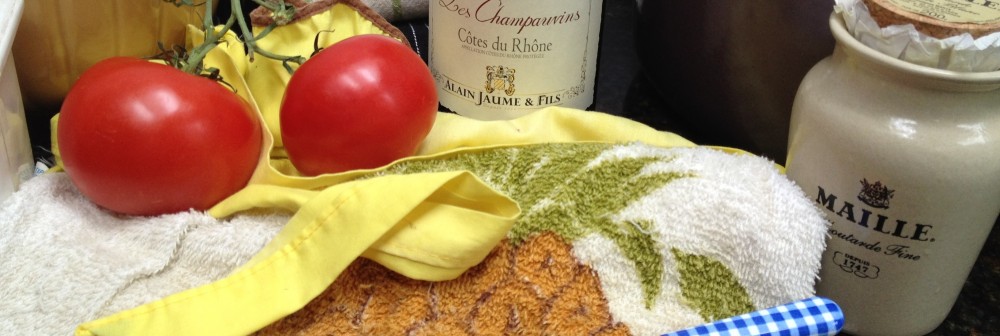
The butter I made on a whim, after reading an article in Fancy Fine Cooking. I just felt like my special bagels deserved good butter. Plus, I’m kind of a show-off.

Two pieces of advice: DOUBLE THIS RECIPE! I made seven bagels, and in retrospect, I wish I would have made six larger ones instead. Twelve decent sized bagels instead of seven smaller ones would have been perfect. And start this recipe ONE DAY BEFORE you want to eat bagels (see step 7: refrigerate overnight).

Bagels, The Los Angeles Times, November 12, 2008

Total time: 1 hour, 15 minutes plus chilling, rising and cooling time for the dough and bagels

Servings: 6 to 8 bagels

Note: Barley malt, also known as barley malt syrup, is generally available at health food stores including Erewhon Natural Foods in Los Angeles and Granny’s Pantry in Pasadena, as well as at most Whole Foods Market stores. Instant yeast is generally available at cooking and baking supply stores. Despite the short work time, this recipe takes two days to make because of the rising time. If you make more than 6 bagels, you may need to prepare 2 baking sheets. Toppings can include poppy or sesame seeds, coarse salt, dehydrated onion or garlic bits that have been soaked, and cinnamon sugar.

3 1/2 cups (1 pound) unbleached bread flour

3 teaspoons salt, divided

3/4 teaspoon instant yeast

1 tablespoon barley malt syrup (or honey)

1 cup plus 2 tablespoons water

1 teaspoon baking soda

Toppings as desired

1. In the bowl of an electric mixer or food processor or by hand, mix the flour, 2 teaspoons salt, the yeast, barley malt syrup and 1 cup plus 2 tablespoons water until the ingredients form a stiff, coarse ball of dough (about 3 minutes if mixing by hand or in a mixer; or 1 minute in a food processor). If necessary, add a little more water. Let the dough rest 5 minutes.

2. Knead the dough on a lightly floured surface until the dough feels stiff yet supple, with a satiny, slightly tacky feel, 2 to 3 minutes. If the dough seems too soft or too tacky, sprinkle over just enough flour as needed.

3. Place the dough in a lightly oiled bowl, cover tightly with plastic wrap, and place it in the refrigerator for at least 1 hour and up to several hours. Keep in mind that the bagels must be shaped before proofing overnight.

4. When ready to shape the bagels, line a baking sheet with lightly greased parchment paper or a silicone baking mat.

5. Remove the dough from the refrigerator and divide it into 6 to 8 equal pieces. Form each piece into a loose, round ball by rolling it on a clean, dry work surface with a cupped hand; do not use any flour on the surface. If the dough slides around and won’t ball up, wipe the work surface with a damp paper towel and try again — the slight amount of moisture will provide enough “bite” for the dough to form a ball. When each piece has been formed into a ball, you are ready to shape the bagels.

6. Using your hands and a fair amount of pressure, roll each dough ball into a “rope” 8 to 10 inches long. (Moisten the work surface with a damp paper towel, if necessary, to get the necessary bite or friction). Slightly taper the rope at the ends so that they are thinner than the middle. Place one end of the dough between your thumb and forefinger and wrap it around your hand until the ends overlap in your palm; they should overlap by about 2 inches. Squeeze the overlapping ends together and then press the joined ends into the work surface, rolling them back and forth a few times until they are completely sealed.

7. Remove the dough from your hand and squeeze as necessary to even out the thickness so that there is a 2-inch hole in the center. Place the bagel on the prepared sheet pan. Repeat with the other pieces. Lightly wipe the bagels with oil, cover with plastic wrap and place in the refrigerator overnight.

8. Remove the bagels from the refrigerator 90 minutes before you plan to bake them. Fill a large stockpot with 3 quarts of water (be sure the water is at least 4 inches deep), cover with a lid, and slowly bring the water to a boil. When it comes to a boil, add the remaining teaspoon of salt and 1 teaspoon of baking soda, reduce the heat and simmer with the lid on.

9. Thirty minutes before baking, heat the oven to 500 degrees.

10. Test the bagels by placing one in a bowl of cold water. If it sinks and doesn’t float to the surface, return it to the sheet, wait 15 minutes and then test it again. When one bagel passes the float test, they are ready for the pot.

11. Gently lift each bagel and drop it into the simmering water. Add as many as will comfortably fit in the pot. After 1 minute, use a slotted spoon to flip each bagel over. Poach for an extra 30 seconds. Using the slotted spoon, remove each bagel and return it to the lined baking sheet. Continue until all the bagels have been poached. Generously sprinkle each bagel with a topping, except for cinnamon sugar (see note below).

12. Place the baking sheet in the oven and reduce the heat to 450 degrees. Bake for 8 minutes and then rotate the sheet (if using two sheets, also switch their positions). Check the underside of the bagels. If they are getting too dark, place another sheet under the baking sheet (i.e., double-pan it). Bake until the bagels are golden brown, an additional 8 to 12 minutes. Remove from the oven and transfer the bagels to a rack for at least 30 minutes before serving.

Note: If using cinnamon sugar (1 part cinnamon to 5 parts granulated sugar), immediately brush the top of each hot bagel with melted butter and then generously sprinkle with the mixture so that it is coated. It will form a nice cinnamon crust as it cools.

Each of 8 servings: 226 calories; 7 grams protein; 46 grams carbohydrates; 2 grams fiber; 1 gram fat; 0 saturated fat; 0 cholesterol; 1,031 mg. sodium.

Step 3, the dough ball

Step 6, formed in O shape

Step 12, hot out of the oven

Homemade Butter by Daniel Leader, Fine Cooking, December 2011

Ingredients

Heavy Cream

1/4 teaspoon kosher salt

In a stand mixer fitted with the whisk attachment, whip 2 cups of heavy cream on medium speed until medium peaks form, about 3 minutes. Put a splatter guard on the bowl or drape a kitchen towel over the mixer and the bowl. Increase the speed to high and continue whipping until the solids separate from the buttermilk (you will hear sloshing), about 8 minutes.

Gather the butter into a ball and put it in a strainer. Rinse under cold water, squeezing with your hands, until the water runs clear, about 1 minute. Knead in 1/4 tsp. sea or kosher salt and shape the butter as you like. Pat it dry with a paper towel, wrap in plastic, and refrigerate for up to a month.

Notes from Dawn: This is obviously super easy as long as you have a heavy duty mixer. 8 minutes is a long time to run a mixer not equipped for such work, so make sure your mixer is up to this task. It is also quite a mess. TOTALLY worth it, but be prepared to clean up a bit.

You’re probably thinking the picture below is not such a mess and I must be a total princess. Oh, you just wait! This is only the first part where it’s still glorified whipped cream.

Okay, was I lying? Isn’t that awful?

But the final product is so delicious and the perfect accompaniment to fresh baked bagels or bread. Voila!

Orangette’s Vegetable and Pearl Barley Soup

One of the things I love the most about receiving and sharing recipes is the feeling of connection which occurs every time you prepare the food. I can’t make sausage strata without remembering my friend Julie. I can’t make Mexican casserole without remembering my friend Bonnie. I can’t make white bean dip without remembering my friend Suzanne. These women and many more are immortalized in my food simply by the act of sharing their favorite recipes, and that is no small thing. It is for that very reason that I strive to post only good and worthwhile recipes here and not waste your time with anything mediocre; I want to be remembered by you fondly. No one achieves immortality through dry banana bread.

As a new blogger, one of the joys I’m experiencing is connecting with friends and relatives from near and far. Chances are, if you’re reading this blog, we have four degrees of separation or less. You either know me personally or you know someone who knows me or you’re related to me in some fashion. Two such people are my cousins Linda and Beth, who have been very encouraging and supportive of my blog. Beth recently linked me Molly Wizenberg’s rather famous food blog Orangette, and while I was familiar with Molly’s name as an avid NPR listener and Bon Appetit reader (as well as being mentioned by my favorite food blogger, The Wednesday Chef), I had never read her blog. I can see now why it is so beloved! The really inspiring part was learning how, like me, Molly just decided one day to do what she loved: cooking and writing. And also like me, she didn’t let lack of proficient knife skills and a journalism degree hold her back!

This recipe is a keeper. As Molly wrote, it doesn’t look like much. If I didn’t hear how good it is from a reputable source, I would have passed it by without a second thought. I’m so glad I didn’t! Believe it or not, this is the first time I have ever cooked with parsnips. (And how cool are parsnips? They remind me of vampire carrots.) Whenever I have parsnips from now on, I will think of Molly’s blog and the first time I ever used them, and whenever I read Molly’s blog, I will think of my cousin Beth who introduced me to Orangette. Food is so much more than something to eat.

Orangette’s Vegetable and Pearl Barley Soup
Adapted from Great British Food, by Cass Titcombe, Patrick Clayton-Malone, and Dominic Lake

A few notes from Orangette:
– I used homemade chicken stock to make this soup, but you could also use good-tasting store-bought chicken or vegetable stock. To me, the best brand is Better Than Bouillon.
– If your celery comes with leaves still attached, save them! Toss in a small handful when you add the cabbage, toward the end.
– Instead of parsnips, try peeled, cubed rutabaga.

3 Tbsp. olive oil
1 large yellow or sweet onion, diced
150 grams (3 or 4 stalks) celery, peeled and diced
150 grams (about 3 medium) parsnips, peeled, cored, and diced
150 grams (about 3 medium) carrots, peeled and diced
150 grams (1 large) leeks, diced
3 large garlic cloves, chopped
Leaves from a few sprigs of fresh thyme
1 ½ liters chicken or vegetable stock
Salt
50-60 grams pearl barley (Dawn used about half a cup)
A couple handfuls of shredded Savoy cabbage or Brussels sprouts
Freshly ground black pepper

Warm the olive oil in a Dutch oven or small stockpot. Add the onion, celery, parsnips, carrots, and leeks, and stir to coat with oil. Cook, stirring occasionally, for about 15 minutes, or until softened. Do not allow to brown. Add the garlic and thyme leaves, and cook for a few minutes more. Then add the stock and a couple of good pinches of salt. Bring to a boil, lower the heat to maintain a gentle simmer, and cook for 10 minutes. Then stir in the pearl barley, and simmer gently for 20 minutes, stirring occasionally. Add the Savoy cabbage or Brussels sprouts, and simmer for 5 minutes more. Taste, and add salt as needed. Serve hot, with freshly ground black pepper, if you like.

Yield: 4 to 6 servings

Romanesco

I literally gasped when I saw this today at the grocery store today and immediately knew it would be coming home with me. How beautifully weird! It reminded me of a sea creature who got lost and somehow wound up in Wegmans produce aisle. I’ve taken so many pictures and none of them come close to doing it justice.

For such an exotic looking piece of produce, it really isn’t that remarkably different tasting. As you can probably guess, it’s like a broccoli-cauliflower hybrid. I think it would really steal the show in a crudités, and you should know by now I sure do love my show stoppers. Tonight I prepared it as I would broccoli: simmered until tender, drained, then tossed with garlic and olive oil. Salt to taste. Voila!

Lest you think this sci-fi veggie was created in a lab by some evil corporation bent on world domination, I have learned that Romanesco has actually been around since the 16th century. Why am I just finding out about this now? Let me know if you’ve tried this before or if you plan on trying it in the future.

Fine Cooking Pan-Roasted Brussels Sprouts with Shallots and Rosemary

Brussels sprouts excite me! I love that for so much of my life, I avoided them like the plague. Their gross, gassy smell, their spongy, soggy texture, their bland flavor…blech! There are few things I wouldn’t eat, but brussels sprouts were on that short list. Were on that list. Now they top my list of favorite foods. And I love that! I love that even as a forty-something woman, I can still change my mind, still discover new things to love, still discover I don’t hate the things I thought I once did. What else will change about me? The things I think I know about myself today will change in the future, and I am reminded of this fact every time I am enjoying brussels sprouts. What can get more exciting than that?

The very first brussels sprouts recipe which won my heart was this one, first published in the November 2002 Bon Appetit, Brussels Sprouts with Pearl Onions in Horseradish Cream. I have made this and recommended this often, always to rave reviews. I was considering that recipe for Thanksgiving, but then I came across this one from the September 2011 Fine Cooking, Pan-Roasted Brussels Sprouts with Shallots and Rosemary.

I made this last night, and it was phenomenal! I mean, what couldn’t be phenomenal if covered in enough cheese and cream and bread crumbs and butter? Even if you are not a big brussels sprouts fan, I hope you will try this. I have a feeling this could win over even the most reluctant brussels sprout eater.

Pan-Roasted Brussels Sprouts with Shallots and Rosemary by Juli Roberts

Ingredients

1-1/2 lb. Brussels sprouts, trimmed
2 large shallots, halved
4 Tbs. unsalted butter
Kosher salt and freshly ground black pepper
1-1/4 cups heavy cream
3-1/4 oz. (1-1/4 cups) finely grated Gruyère
1/4 tsp. freshly grated nutmeg
1/8 tsp. cayenne
3/4 cup panko
1/2 cup finely grated Parmigiano-Reggiano
2 tsp. finely chopped fresh rosemary

Directions:

Position a rack in the center of the oven and heat the oven to 375°F. In a food processor fitted with the slicing blade, slice the Brussels sprouts and shallots.
In a 12-inch oven-safe skillet, melt the butter over medium heat. Continue to cook the butter until it begins to brown and smell nutty. Set aside 1 Tbs. of the browned butter in a medium bowl.

Add the Brussels sprouts, shallots, 2 tsp. salt, and 1/2 tsp. pepper to the pan and toss to combine. Cook, stirring occasionally, until the Brussels sprouts and shallots begin to soften and brown in spots, about 6 minutes. Remove the pan from the heat.

Meanwhile, in a 2-quart saucepan over medium heat, combine the cream, Gruyère, nutmeg, cayenne, and 1/4 tsp. salt. Heat until the cheese is melted, whisking occasionally, about 4 minutes. Do not boil. Add the sauce to the Brussels sprouts, carefully stirring to combine.

Add the panko, Parmigiano, rosemary, and a pinch of salt to the reserved butter and mix thoroughly. Top the sprout mixture with the panko mixture.

Bake until the crumbs are browned and the Brussels sprouts are tender, 10 to 15 minutes. Let cool for about 5 minutes before serving.

Serves 6 to 8

This is what the brussels sprouts and shallots look like after six minutes in the pan.

On the plate and ready to convert more haters to lovers!